FlashFXP TutorialsTutorial 2: Connecting to a siteNow we are going to connect to the site we just created in tutorial 1. There are several ways to to this. But for this example lets assume we've just launched FlashFXP. Click on the Connect button, which looks like a lightning bolt. 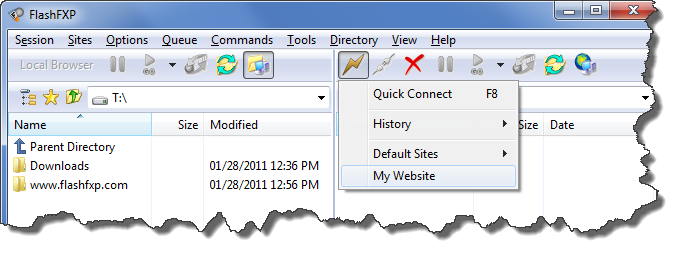
There we will see our site, let's click on it. FlashFXP will now connect to the site and you will see something like this: 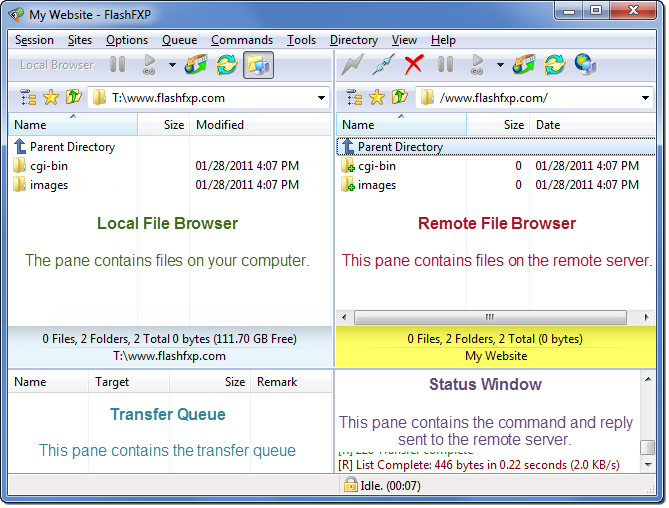
This is the default FlashFXP interface. It consists of a menu, two toolbars, two large window panes and two small ones. The window pane on the left is the local file browser, It will show you the content of your harddrive. The window pane on the right is the remote file browser, It will show you the content on the server. There are two more displays, the smaller ones.
On the bottom left you have the Transfer Queue which shows files that are currently being transferred or queued for transfer. |
Table of Content
|